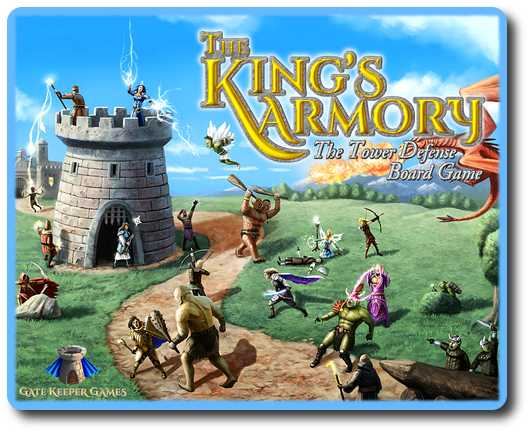
The Basics:
- For ages 8 and up (publisher suggests 13+)
- For 1 to 7 players
- Approximately 180 minutes to complete
Geek Skills:
- Active Listening & Communication
- Counting & Math
- Logical & Critical Decision Making
- Reading
- Strategy & Tactics
- Visuospatial Skills
- Cooperative & Team Play
- Hand/Resource Management
- Worker Placement & Area Control
Learning Curve:
- Child – Difficult
- Adult – Moderate
Theme & Narrative:
- Protect the castles walls from the invading army
Endorsements:
- Gamer Geek approved!
- Parent Geek mixed!
- Child Geek rejected!
Overview
The King has called you to his throne room. There he implores you to help defend the kingdom from an army bent on destroying all that lies beyond the protective walls of the castle. You promise the King to lead his army and rout the enemy. Rallying your troops, you make ready for the battle to come.
The King’s Armory, designed by John Wrot and published by Gate Keeper Games, is comprised of 17 double-sided Map tiles, 12 Border tiles, 7 Hero Stat cards, 12 Hireable Stat cards, 7 Boss Stat cards, 1 Wave card, 7 Hero tokens, 51 Hireable tokens, 1 Guardian token, 1 Sword Golem token, 85 Monster tokens, 7 Boss tokens, 7 3-Demensional Tower pieces, 1 Castle Gate token, 185 Hit tokens (in the values of 1, 5, and 10), 1 Monster Controller token, 7 Player Turn tokens, 3 Monster Reference tokens, 1 Game Order Quick Guide token, 2 Turn Order Quick Guide tokens, 56 Status tokens (track Bleed, Burn, Slow, Stun, and Bless), 36 Reward cards, 14 Equipment cards, 11 Reinforcement cards, 7 Armory cards, 7 Hero dice (two-toned standard twenty-sided dice), 1 Monster die (standard twenty-sided die), and 1 Monster Selection die (standards twenty-sided die). All tokens and tiles are made of thick cardboard. The cards are as durable as your standard playing card. The 3-Dimension Tower as slightly less thick than the playing cards and are meant to be folded to create a paper tower. While not as durable as the rest of the game components, it’s nevertheless still considered to be of good quality.
Protecting the Crown
To set up the game, first organize all tokens by color, number and shape. This is important for two reasons. First, there are a lot of bits in the game. Second, organizing the components will reduce the amount of downtime necessary to bring new pieces into the game or remove pieces from the game. Players should also take this time to assemble their Towers.
Second, take the Map tiles and create the map area that will be played on. The Map tiles are square and portray the paths the invading hordes will be using during the invasion. A “first time player” map is provided which I highly recommend all new players use. If creating a new map, Map tiles must be placed so one Map tile connects to the Monster Entrance tile (the entrance) and one Map tile connects to the Castle Gate tile (the exit).
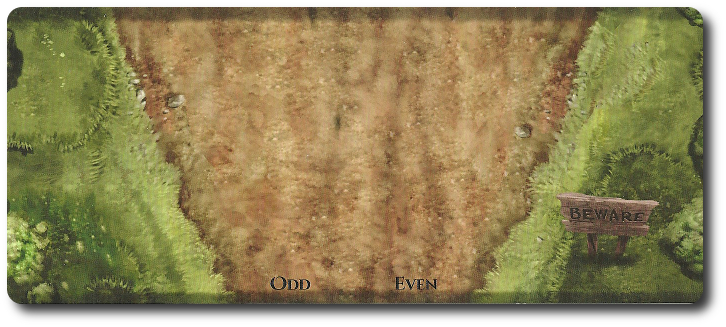
Here there be monsters, of the odd and even variety…
Then any number of Map tiles can be added to create an unbroken path between the entrance and the exit. The standard game is a 4×4 Map tile area and a Map Border tile pieces help the game stay together. The recommended approach to building the Map tiles is to first use the Map tiles to create the type of area to be played in and then add the Map Border tiles where applicable.
Second, organize the cards into 4 decks. These will be Reward, Reinforcement, Equipment, and Armory. Shuffle each separately. Place the Reward, Reinforcement, and Equipment decks face-down on their designated areas found on the Map Boarder tiles. Then randomly select 1 Armory cards and place it face-down on it designated area also found on the Map Board tiles. Do not look at the Armory card. Place the rest of the Armory cards back in the card box.
Third, take the Monster and Boss tokens which should now be organized by color and number, which indicates type and level. Turn each stack face-down (image side facing down) and shuffle, making sure to keep like colored and numbered tokens together. There should be 6 stacks. A yellow stack (1), a green stack (2), a blue stack (3), a purple stack (4), a red stack (5) and a black (boss). Place these stack next to the Monster Entrance tile. Repeat this for the Hit Point tokens. Place the Wave card, Monster dice, and Monster Selection die next to all the tokens. The Boss Statistic card can remain out or placed back in the box until needed during the final attack wave.
Fourth, place the Hireable Stat cards near the Castle Gate tile. The Hireable tokens remain in the box until needed.
Fifth, place the assembled Towers next to the Castle Entrance tile along with the Status tokens.
Sixth, place the Castle Gate token on the “Caste Gate” Border tile with 20 Hit Points worth of Hit Point tokens underneath it.
Seventh, players must now select their Hero. Each player can only select 1 Hero card which can be done at random or time can be given for each player to think about which Hero to use. Hero cards are placed in front of their owning player and a number of Hit Point tokens are given to each based on the Hero card stats. Any Hero cards not selected are returned to the game box.
Eighth, players should now determine player turn order. In turn order sequence, players draw 2 Equipment cards. These represent special pieces of equipment that are being offered for sale to the Hero, but are not yet purchased. Equipment cards are placed face-up next to the Hero card until purchased and equipped.
Ninth, in turn order sequence, each player places their Tower on any open terrain, but never on a Border Map tile or Path Map tile. Depending on the number of players in the game, an individual player might have more than one Tower to place. After the Towers are placed, each player places their Hero token on the map within 2 spaces of their Tower. This takes up 1 of possible 3 “Hosting Slots” for the tower. A Tower can host Hireables as well as Heroes, but no more than 3 at a time. Think of Hosting Slots as room in the Tower that forces use to defend or retreat back to. Heroes will not depend on the Hosting Slot of a Tower once the battle begins, but pretty much everyone else does.
That’s it for game set up. Any pieces not mentioned should remain in the game box unless specifically called for during game play.
HERE THEY COME!!!!
The King’s Armory is not a small game. Even the rule book admits as much and tells the reader that they need to read, not play, the 62 page rule book to page 21 before playing. After page 21, even more rules are given, but these rules are not always in use. This makes the rule book not only a teacher but also an invaluable reference source.
I am only going to summarize the game play here. Not to worry. You’ll still get all you need to know to learn if the game is for you or not. The game could take up to 3 or more hours to complete, but I only want you to spend about 10 minutes reading the review. Unless you are a slow reader. In which case, go grab some popcorn because you might be here for a bit.
The King’s Armory is played in attack waves and rounds. A single attack wave will have multiple rounds as Monsters and Heroes do battle. The number of attack waves in a game can be anywhere from 5 (standard) to a maximum of 7. More attack waves means more monsters.
Summarized here is a typical order of play.
The First Attack Wave: Monsters Enter
The Monsters that come into play each attack wave is based on a roll of the die and the number of players in the game. The Wave card has a “Monster Selection Grid” that corresponds with the rolled value of the Monster Selection die. The number of Heroes in the game alters the result.
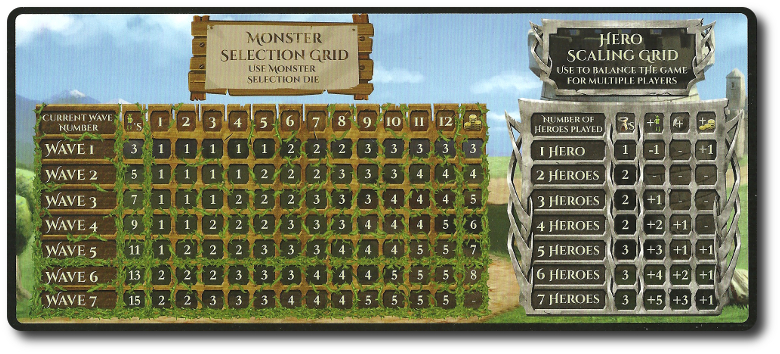
One player should take on the role of “Monster Controller” for the round (the Monster Controller changes every round of the game) and places 1 Monster token on the entrance at a time per roll, along with the appropriate number of Hit Point tokens underneath the Monster token. As soon as the Monster token is placed, it gets 3 actions that must be taken in sequential order before the next Monster token is placed. If playing with 2 Monster entrances, the Monster Controller will alternate between entrances when bringing new Monster tokens into play.
- Upkeep: status effects are resolved and the Monster is impacted by the effects.
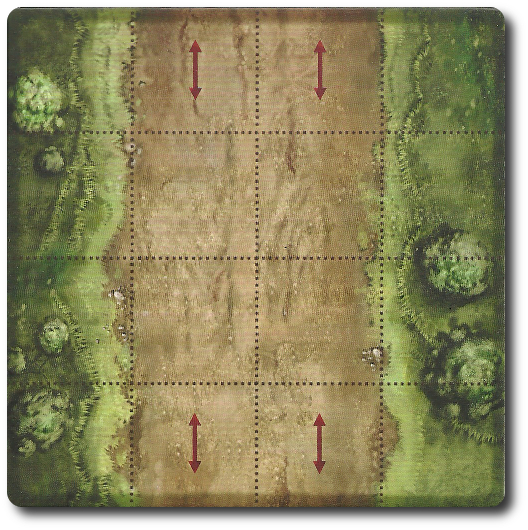
- Move: the Monster Move rate and Movement Arrow colors are used to determine how far along the path the Monster token is moved (red or yellow arrow paths). Monsters can bump into each other and causing tokens to move around. Movement always costs 1 Action Point to move any number of spaces up to the maximum determined by the Monster’s Movement Rate. Movement can be repeated multiple times per turn.
- Attack: every Monster will attack if possible and always in a specific priority order starting with assisting another Monster to attacking the Castle Gate. The only time a Monster token will not attack is if any enemies are out of range. Players would do well to keep in mind how the monster attack priority works. Using it, the players can correctly determine what the Monster token will attack well before it approaches. This will assist the players in fortifying and equipping correctly. Combat is determined by rolling the Monster die and adding the rolled value to the Monster’s Hit Roll bonus. If the total value is equal or higher than the Dodge value of the defender, then the attack is successful. Damage is dealt and then reduced based on resistance. The final number represents the actual damage taken, which reduces the target’s Hit Points. The minimum damage any attack inflicts is always “1”. This is true for both Monsters, Hireables, and Heroes.
All the Monster Stats are listed on the Monster token. Admittedly, these can be difficult to learn at first, but players need to quickly familiarize themselves with the icons so they can learn at a glance the strength of their foe.
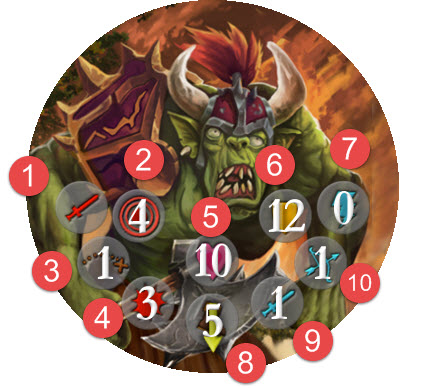
- Monster Type (ranged, melee, etc.)
- Hit Roll value
- Range (number of spaces away from the token a target can be hit – in this case, “1”)
- Damage
- Hit Points
- Dodge value
- Supernatural (Magic) Resistance
- Movement Rate
- Melee Resistance
- Range Resistance
This above 3 steps are repeated for every Monster token placed. After every Monster token has been placed, moved, and given an opportunity to attack, the players have their turn.
The King’s Army Attacks
Each player will be controlling a “team” consisting of a Hero and any Allies (commonly referred to as “Hireables”). Players take their turns in the turn order sequence they established during game set up starting with the first player. During a player’s turn, they can decide the order in which their team will engage the monsters. Only after the player completes their turn by attacking all the monsters possible does their turn come to an end. The next player then goes and so on until all the players have had a chance to defend the King.
Heroes of the Realm
All Heroes have a Hero Stat card. Listed on the card are the Hero’s Hit Points, Heal Rate, Move Rate, and various other information that covers attacking and special abilities. Also included is a stat referred to as Action Points. When the player uses an action that has an Action Cost, the Action Points are reduced. In this way, the player decides what actions their Hero will take, but they must do so by determining how best to spend their Action Points.
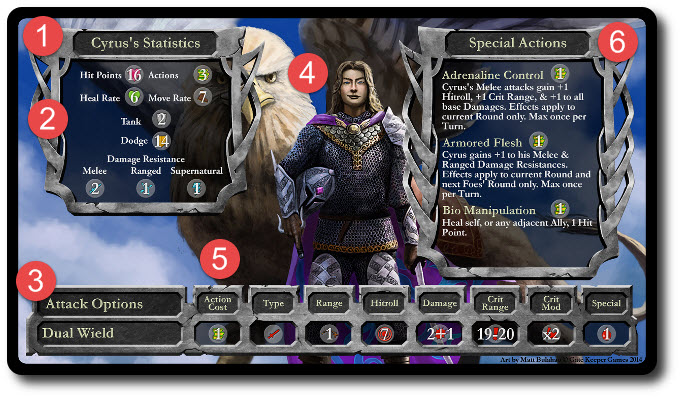
How can I not like a Hero that shares my first name? Plus, LOOK AT THAT HAIR! PERFECT!
- Hero Name
- Stats Block: all the major information for the Hero is located here for quick reference. This section will also include any special ability notes.
- Attack Options Block: the Heroes most basic attacks are listed here.
- Hero Image: match this to the Hero token.
- Attack Statistics: players will get to know this section well. It lists all the important information to determine how many Attack Points they will be spending and how much damage they will be inflicting on the enemy.
- Special Actions: each Hero has Special Actions they can take, but note that nothing is for free. Special Actions cost Action Points.
Players can take as many actions as they like as long as they do not exceed the Hero’s Action Points. The total amount of movement does not cost Action Points, but range is limited by the Movement number value. Heroes can pass through Allies, but no two tokens can share the same space. After that, the player can use their Action Points as they see fit, but one should not use them without reason. Heroes and Allies are meant to share a certain level of synergy on the battlefield. Put another way, the Special Abilities a Hero will have will benefit other Heroes and Allies, while certain abilities of Hireables will benefit other Heroes. As such, players need to consider how their actions, or lack thereof, will benefit the rest of the players. For example, a player may want to spend a great deal of their Action Points to enchant the King’s Army, but doing so will leave the Hero vulnerable. Not a problems, since the other players will be benefiting from the enchantment and will be protecting the enchanter. In a very real way, players get to create combos that improve their odds of success and maximize enemy destruction.
All the King’s Men
The player’s Allies (Hireables) are moved and used to attack Monster tokens pretty much in the same fashion as the Heroes. The moving and attacking rules are the same, as well as any and all limitations and restrictions. Hireables do not have individual cards, but have a shared Hireable Stat card. Of particular interest to all players is the Hireable ability to “level up”. The longer they are in the campaign (and survive), the more powerful they become. Hireables include Foot Soldiers, Archers, Clerics, Psionicists, and Sorcerers.
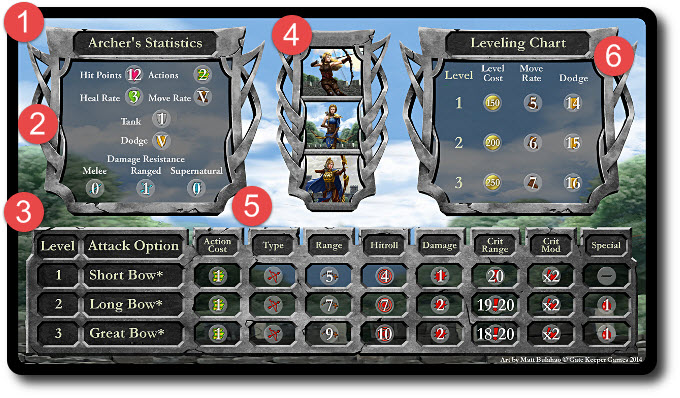
- Hireable Name
- Stats Block: all the major information for the Hireable is located here for quick reference.
- Attack Options: all Hireables start at Level 1. As they increase in level, the number of Attack Options will change, providing more powerful attacks. A Hireable, however, always has access to their less powerful attacks.
- Hireable Image: actual image depends on the Hireable’s level.
- Attack Statistics: these are identical in layout to the Hero Stat card. They are also used in the same way.
- Leveling Chart: Hireables are always obtained at Level 1, but can be upgraded between rounds. The chart details the cost and benefits of improving a Hireable.
Hireables are meant to protect and defend, not necessarily rush and attack. They must always stay within 2 spaces of a Tower, as a result. Only 1 player can control a Hireable group at a time. That is, only one player can control all the Archers during an attack wave. Control of the Hireables can be shifted during the Reposition Allies step.
Finally, only so many Hireables can be used during a game. More importantly, once a Hireable falls in battle, they cannot return. This means players sacrificing a Hireable will also lose a soldier in the war that cannot be replaced.
The Next Waves
After all the players have had a chance to take their turn, it’s again the Monster’s turn. After the Monster is done, it goes back to the players. This continues until either all the Monsters are defeated, all the Heroes are defeated, or the Castle Gate has been reduced to zero hit points.
In the likely event that the Castle Gate is attacked, take comfort in knowing that the castle can defend itself to some degree. The Castle Gate will take the full damage dealt from the Monster, but then the forces within completely destroy the Monster, removing it from the game. Unfortunately, the Castle Gate has no counter for a ranged attack.
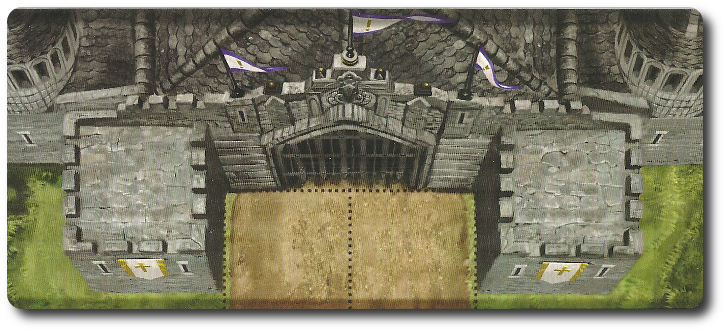
Impregnable, too a point…
A Moment to Breath
After one round ends and before a new round begins, players have a chance to regroup. Follow these sequential steps between the onslaught of monsters to prepare for the next battle to come.
Step 1: Heal
All Heroes and Hireables heal based on their Heal Rate. Defeated Hireables are lost once their Hit Points are reduced to “zero” or less. Heroes never die, but are knocked out when their Hit Points are reduced to “zero” or less. Hireables cannot be brought back from the Land of the Dead, but a knocked out Hero can be healed and sent back into the battle.
Step 2: Loot the Fallen
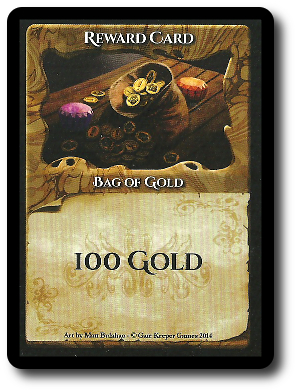
A number of Reward cards are drawn based on the attack wave completed. The gold can (and should) be used to build up the King’s Army. All gold is shared equally among the players.
Step 3: Spend Gold
Gold can be used to buy and upgrade, but players should discuss what they want to do before spending the loot on something foolish.
- Build a Tower (100 gold) – Players need these to protect the paths and to place Hireables
- Sell a Tower (earn 50 gold) – If the players determine they have too many Towers, they should sell them to reinforce other areas
- Hire Hireables (costs is listed on Stat card) – Hireables are ready to join the fight, but they are a limited resource
- Upgrade Hireables (cost is listed on Stat card) – Train and level the Hireables to be more impressive and effective warriors
- Unlock Hero Equipment (150 gold) – These gifts were freely given to the Heroes, but they do not come without a price
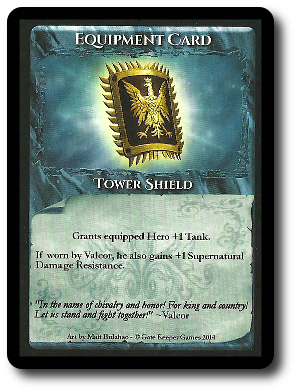
- Buy New Equipment (100 gold) – New Equipment card be purchased and is placed next to the Hero Stat card unlocked. A player will still need to equip it to use it.
- Sell Unlocked Equipment (earn 50 gold) – If you don’t need it, sell it. Equipment will never break or be damaged, but the player might not need it anymore or want to trade it in for gold.
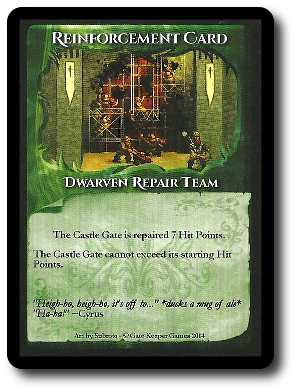
- Buy Reinforcement (200 gold) – Help is always available to those who can pay for it
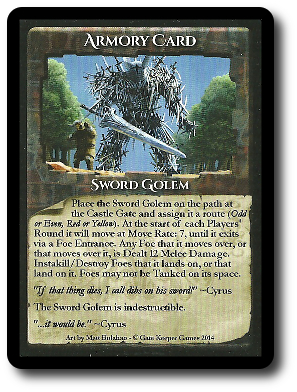
- Fund Armory (900 gold to 1,200 gold) – The armory is worth every gold piece if the players can afford and live long to enjoy it
Step 4: Loot Clean Up
After spending any gold, players should exchange their cards to make as many 100 gold as possible. This can be done by looking through the Reward deck and exchanging 2 “50 gold” Reward cards for 1 “100 gold” Reward card. Then shuffle the Reward deck and place it back, face-down.
Step 5: Make Ready the Heroes
Any unlocked Equipment or new Equipment purchased (which always is unlocked) can now be equipped. Each Hero can have a maximum of 2 Equipment cards in use. Players can also trade unlocked Equipment cards with each other if they like. Extra equipment that is not equipped is not lost, but nor is it within easy reach. Players can decide to equip them later in the game, trade them, or sell them, but only between rounds.
Step 6: Reposition Allies
Players now move the tokens on the Map tiles so they are all within 2 spaces of any Towers that remained or were built. A maximum of 3 tokens can be placed for each Tower. If players do not have enough Towers to host the Heroes and Hireables, it’s the Hireables that will sit the next round out. If this happens, players have made a mistake, and need to go back and buy additional Towers if they have the gold for it. Never let your warriors take a breather when there is an enemy to kill.
It should be noted that control of any Hireable can be given to any player. They are hired individually, not as groups. The maximum that can be hired per round can be split among the players, providing for a more strategic build of the King’s army.
Players may also reorder their turn order sequence at this time and reassign which player is controlling which Hireable group.
The Attack Continues
The second and additional rounds to follow are played and completed in the same fashion as the first, except they get harder. Players have more bonuses, however, as their Hireables advance in level, equipment is unlocked, and new bonuses and abilities come into play. At the end of each round, and only if the Heroes survived, the players can again heal, buy, and reorganize.
Final Round and the Big Boss
The final round starts as all the others, with the Monster tokens coming into play and moving about causing problems. After the Monsters have had their second turn and before the players have their second turn, the Big Boss Monster makes its appearance. The Big Boss Monster is randomly selected and brought into play. The current Monster Controller should take a moment to collect the State card and tokens necessary.
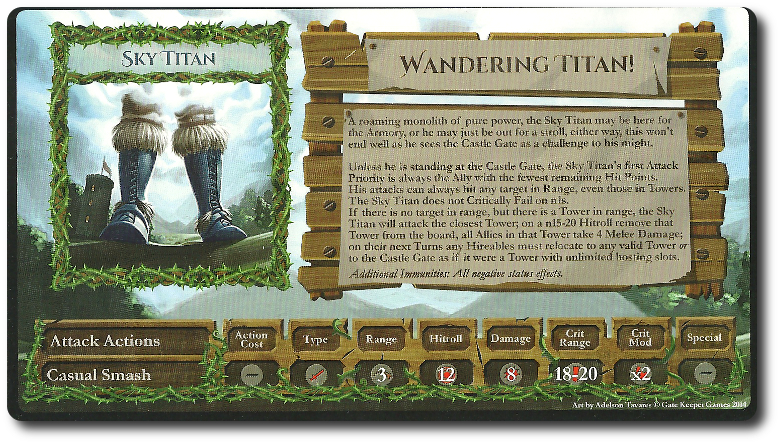
We’re going to need a bigger bow…
Each Big Boss Monster has unique rules that immediately impact the game and override any other rules. However, Big Boss Monsters also follow the same rules as all the less monsters. They first have their upkeep, then move, and then attack. This makes the Big Boss Monsters somewhat predictable, but no less dangerous.
Big Boss Monsters do not change the requirements to win the game, but they do make it much harder to win. There was no way for the players to avoid this final confrontation and they should congratulate themselves for making it this far. This is the round and the final battle. How it ends will determine the fate of the kingdom.
The Battle Ends
The battles continue until the Heroes are victorious or the Monsters overwhelm the King’s forces. This is an all-or-nothing battle, meaning only 1 side is going to win.
The player’s win if they are able to survive all of the attack wave and the Boss Monster with at least 1 Hit Point left on the Castle Gate. Many Heroes and Hireables may have died, but their sacrifice was not in vain. The kingdom stands strong!
The players will lose if all the Heroes are lost or the Castle Gate’s Hit Points are reduced to “zero” or less. The monstrous forces have won and now the kingdom trembles in fear of what will happen next!
What We Didn’t Cover
Lots.
The King’s Armory has lot going on, from stats to different ways to attack Monsters. For example, players can “Tank” a portion of the path to stop Monster tokens from moving forward. Very useful to buy time to reinforce weaker positions. Status effects can play a major role in the game, allowing players to slowly burn the strength away from a powerful Monster they dare not face up close. Players can also teleport tokens around the Map tiles, allowing for faster army movement. Some Monsters can fly making them difficult to attack, let alone stop. A great deal of what a player can do is dependent on the Hero they use and the Hireables they have at their commend. The rule book covers it all in great details.
For the Prince! Or Princes!
Of particular interest to gamers with Child Geeks is a dedicated section in the rule book that covers how the game should be played with younger players. You can also use this section to play the game with inexperienced players. A suggested method of teaching the game is provided and some rules to ignore. What I particularly liked is that the suggestions do not dumb the game down. It’s still challenging and still big.
The Reduction and Addition of Players
Because the game is so big and can take a long time, it’s possible that one or more players will need to bow out. Or perhaps all the shouting and cheering at the table has drawn a few players who want to join in. The King’s Armory has rules that allow players to drop or be added during the game without upsetting the game. This allows the battles to continue and the players who have been engaged from the start to focus on their mission to save the kingdom without the game itself being ruined. Because everything is based on the number of players, the game’s level of difficulty will adjust itself accordingly.
Tailoring the Game
There is a great deal of information on how a player can tailor the game to increase the difficulty or to adjust the game to meet their personal requirements. A number of Map tile placement examples are provided, including some that provide 2 entrances for Monsters to emerge. One Map tile layout includes 1 single entrance point, but a split in the path. This means the players will have to watch 2 paths and the Monsters attacking are coming at them at the same rate. Very, very difficult in deed.
To learn more about The King’s Armory, visit the game’s web page.
Final Word
The game immediately drew the attention of the Child Geeks. The King’s Armory is visually very interesting, especially if you fold the Towers correctly. Learning the game did not go as smoothly as we would have liked, even when using the suggestions provided by the game rule book that specifically focuses on children (and non-gamers). The biggest hurdle the Child Geeks had was simply keeping track of what was going on in the field of battle, which is somewhat surprising since the turn order sequence an steps to complete attack waves if fairly straightforward. According to one Child Geek, “What I keep getting confused about is what I can do during my turn and with what fighters.” This was only an issue with the younger and less experienced Child Geeks. The older and more experienced Child Geeks had no problems learning the game, but lost interest after the third round. As one Child Geek put it, “The game isn’t fast enough. When I play Tower Defense games on the computer, the armies come at you quickly and you have to make important choices. The choices I make are important, but the down time is horrible.” When all the games were over, many of the Child Geeks thought The King’s Armory looked to be a fun and interesting game, but even more found it to be a game not for them.
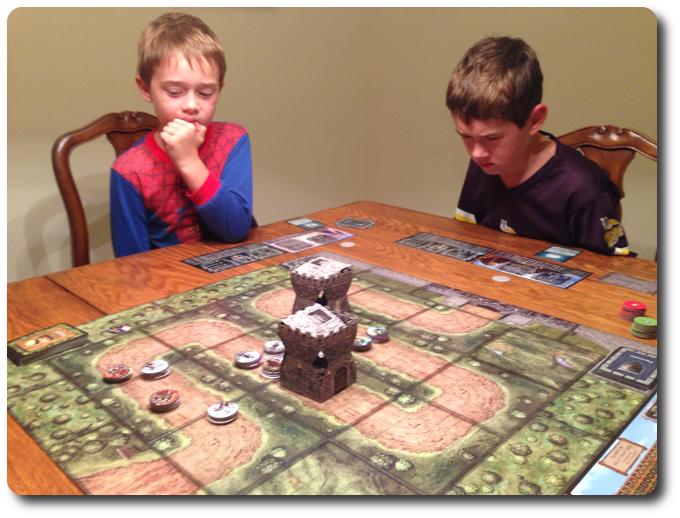
My two oldest liked to shift the Towers over paths to help them visualize ways to block enemies
The most surprising result from watching the Parent Geeks was seeing the casual gamers take a strong interest in playing The King’s Armory. According to one Parent Geek, “This game really appeals to me as I can clearly see what is coming, I have time to prepare, and then I get the cross my fingers and hope we did everything right.” The non-gamers and less experienced Parent Geeks felt very much the same way as the Child Geeks. The casual gamers and the more experienced Parent Geeks enjoyed the game, but not fully. According to one Parent Geek, “I like the game a lot, but it’s too long. I don’t have a lot of free time to play games and I want to get in as many as possible. I’ll play this game again, but not as often I think I would like. I can’t teach the game easily and I can’t play the game fast enough.” After saving the castle walls, the Parent Geeks gave The King’s Armory a mixed level of approval.
The Gamer Geeks were very critical of the game’s rule book, artwork, and the paper Towers. According to one Gamer Geek, “The illustrations are horrible, the paper Tower is laughable, and the rule book is a nightmare.” But that didn’t stop them from enjoying the game. Once they learned how to play, they focused more on the game experience than the game’s looks. The rule book continued to be an issue (could not easily and quickly look up information), but the game’s surprising level of depth and strategy tickled their fancy. As one Gamer Geek put it, “This game feels unnecessarily bulky and unrefined, but it actually plays really well. What it lacks in sophistication it more than makes up for it strategic game play.” The game’s length didn’t bother the Gamer Geeks and they often finished their games within 2 hours. The Gamer Geeks voted to approve The Kings’ Armory.
The game’s rule book is going to intimidate the hell out of casual players and non-gamers. It’s big (over 60 pages) and is as detailed as a role-playing book. Ironically, the game is not that complicated once you learn how to play it, but the rule book would suggest otherwise. The book’s bulk comes from the tremendous amount of detail and extra material it provides. Multiple ways to play the game, a complete encyclopedia, tips, strategies, and even a short bio for each Boss Monster. It’s a solid rule book, but it can also be difficult to navigate. Many of our teachers had trouble at first and a few of our groups even played the game exceedingly wrong. The thing is, it’s all there. There is no reason to guess because it’s all spelled out in the rules. Be that as it may, it’s not a source of knowledge that can be quickly searched. I suggest any person who is about to play the game for the first time or teach it spend a half-hour just reading the rules before setting up the game.
While the artwork at times did have many of our players snickering, the Towers had just about everyone sneering. The Tower is an interesting idea, but I feel that it was a mistake. The Towers, once built, do not easily disconnect and lay flat again. After 6 games, our Towers were looking very beaten up. I would have preferred a large token versus the 3-dimensional paper Towers. While interesting to look at, they are too flimsy, are easily damaged, and become a hassle to play with rather than a joy.
The King’s Armory is a really big game that does a really great job of capturing the complexity of strategically planning and tactically executing defensive and offensive maneuvers to protect a single point. It is, in every way, a tower defense game. As big as it looks and feels, it’s not that complicated to play. I believe the game’s perceived level of difficulty is due to the rule book and the tremendous amount of information it gives to the players in hopes that it helps them make choices. Ironic.
You will never hear me suggest to casual players or non-gamers that The King’s Armory is a game they should play on their own. It would destroy them. There is too much going on. I wouldn’t hesitate to suggest they let me teach the game to them. This is a game were new players benefit from having a player with experience with the game teach how it’s played. There are a lot of gotchas, many “if this, then that” type of scenarios, and so many rules at times that it will make some have a nosebleed. But the game is very playable, and more to point, enjoyable.
If you are a fan of tower defense games, where working as a group is just as important as the lone solder who is guarding a bend in the road, and the game play is always different, then do sit down and play The King’s Armory.
This game was given to Father Geek as a review copy. Father Geek was not paid, bribed, wined, dined, or threatened in vain hopes of influencing this review. Such is the statuesque and legendary integrity of Father Geek.


FatherGeek and teams, thank you so much for this overview. It’s really big (as TKA would require!) so I deeply appreciate the time you all, Cyrus especially, took to play, teach, and re-teach to so many groups. Truly wonderful!
I can see from this post that there were clearly some rules that unfortunately were not played correctly during the playtests, and some that were even mis-stated here. So for the sake of clarity, and not from any lack of gratitude, but rather in gratitude and completion, I’d like to clear them up here for all our readers.
**Rule corrections**
-Eighth step of setup – Players should NOW, determine player order. This is clearly a simple typo issue, but a confusing one.
-Movement – Always costs 1 Action Point to move any number of spaces up to your movement rate; and can be repeated in a single turn.
-Monster Controller – The MC is an honorary title given to the player controlling the Monsters. The MC is not a GM, but simply the one manipulating the monsters during their turn; and the control of the MC role changes during the game, and is usually shared among several players at the table so everyone is involved all the time. This is designed to reduce or eliminate “downtime”. Players never make a choice for the Monsters.
-Equipment – Equipment never gets damaged, or broken, but rather remains the whole game and always grants a powerful boon to the Hero using it. Equipment yet unpurchased is in the Armory still being made or enchanted, giving you the option to buy or not. This unique mechanic allows for a manner of “Leveling up” your Heroes; yet allows ALL Heroes to access any Leveling bonus currently available.
-Hireables – Control of any Hireable may be assigned to any player; since they do not come in groups, but are hired individually, the total that you may hire during a game may be split up across as many players as you choose.
-Healing – There is no real difference between “defeated” and “knocked out”; only that Hireables reduced to 0 HP are always “defeated” and never return; while Heroes reduced to 0 HP are always “knocked out” as they always heal and return between waves.
-Not mentioned here, but commonly missed rule: Minimum damage is always 1, regardless of resistances, unless they are immune. Verrry helpful! : )
**Suggestions to each Gaming Group:**
*Child Geeks – It’s best for an adult to learn the game, then integrate the kids. The “Publisher suggests 13+” for a reason. ; ) TKA if very complex and deep. I don’t expect any 7-9 year old to be able to teach it to themselves. When the Child Geeks are playing and hoping for less downtime, allow them to control a Hirable on another parent’s turn. They get 2 turns each round that way. Be sure to include them during the Monster’s turn, and have them do the math on hitroll and damage.
-The Drop in Drop out Mechanic was made for the guy who’s always late, the girl who always leaves early, and for you with your kids. Let the child geeks “Drop out” after Wave 3 if that’s as long as they can handle it, and allow the game to scale back down in difficulty to continue as they go to bed.
Thanks, dear little ones for playing!
*Parent Geeks – We understand your concern. From go we set out to make “A gamer’s game”, and we’re excited that you really liked it. “Won’t play it as often as we like” is a great compliment, so thank you.
-The “Adjustable Play Time” Mechanic was put on the box for YOU. 3hrs is the average for 2-5 gamers sitting down to play. But we have “Jump Start” rules in the “Game Play Variants” section of the Manual, on page 57, to help you out with this. I have many friends who play the first 3 Waves in 1.5 hours; then pack up for the night. The following game day they pull back out, make the same map, choose the same Heroes, and use the Jump Start rules to pick up at Wave 4, and play to completion in the next go; getting a full game in as their schedules allow.
Thank you, parents for taking your time to try it. I hope you get a chance to give it another go soon.
*Gamer Geeks – Thank you for your overall love of TKA. I understand there was some mix ups with some rules during some testing with some of you and I’m glad it got worked out! : )
While, I wish the post said more about what you guys liked that you approved it for, as I think that would be helpful to readers, I’d like to comment on the 3 negative feedbacks that were mentioned in the closing section above.
-Art – Your opinion on the art, is yours. I’m sorry you feel that way. We employed over 20 indie artists from the Philipines to Russia back down to Antarctica to work on TKA and we really enjoy how the art came out (though 1 or 2 pieces we admit we’d replace on a reprint).
-Towers – Your opinion the towers is not uncommmon. We had 2 choices: A 2d tower symbol, or a 3d epic tower that if someone didn’t like they could cut the roof off for to make a 2d symbol. … : ) I think we chose well. For those of you looking to get that symbol without having to cut your game pieces, visit this BGG page where people share ideas and we share printable files for you. : ) https://www.boardgamegeek.com/images/boardgame/145493/kings-armory
-Manual – Finally, I must respectfully disagree with the assertions on the Manual here. A game manual needs to be read as a game manual is designed to be read. Ours asks you to read from page 2 to page 21 straight through, at that point you’ll have been walked through, step by step, what 90% of what you need to play TKA, and this section has been lauded by several reviewers. It is closely followed by a 20 page Alphabetical Glossary of nearly every term, rule, and possible corner case in the game; and it sits right over the center of the rulebook so it can be easily found. With love and respect I say: that’s simply not “a nightmare”, that’s ideal. : ) Or “How a rule book should be written” as some have stated. : D Then the last 20 pages are bonus content! A monster Bestiary (just because that’s cool), Hero backstories, game play variants (such as Survival mode) that one would expect out of a TD game, and more. : ) Again, I respect your right to any opinion you have, but the manual is actually great, and has been pretty well lauded, so I was surprised to read that. I hope you don’t mind me sharing that here.
Overall, I’m super grateful that you took the time to play our game, that you liked our game, and that you were able to see past the 3 issues above that bugged you in order to enjoy the game. If you read this, I’d love for any of you to share what aspects of the game you liked that brought you to approve it.
Thank you to everyone for taking the time to play TKA and write up this wonderful post, and to share the thoughts of your many with us.
With gratitude,
John Wrot!
Designer and Publisher of The King’s Armory
Thank you very much for your comments and corrections, John. I believe you posted without seeing the corrections we already made due to the browser cache. Regardless, it is always better to have the most accurate information and I am most grateful for any corrections I receive.
It seems I indeed saw the original post again (oh silly browser cache), but am happy to have posted the corrections anyway for those who saw the original post. It will also help those who played in your groups with some of the misstated rules to better understand for their next plays as well.
Overall I’m happy with the net review. I’m not surprised the Child Geeks mostly turned it down, though it seemed somewhat “mixed”; it’s a long deep strategy game made for the gamer geeks! : ) And I’m happy the Gamer Geeks loved it! So all in all, a verifiable success.
Best to all, and happy Gaming!